今天记录下Github仓库的公私钥配置,这个问题在项目中已经遇到多次了。
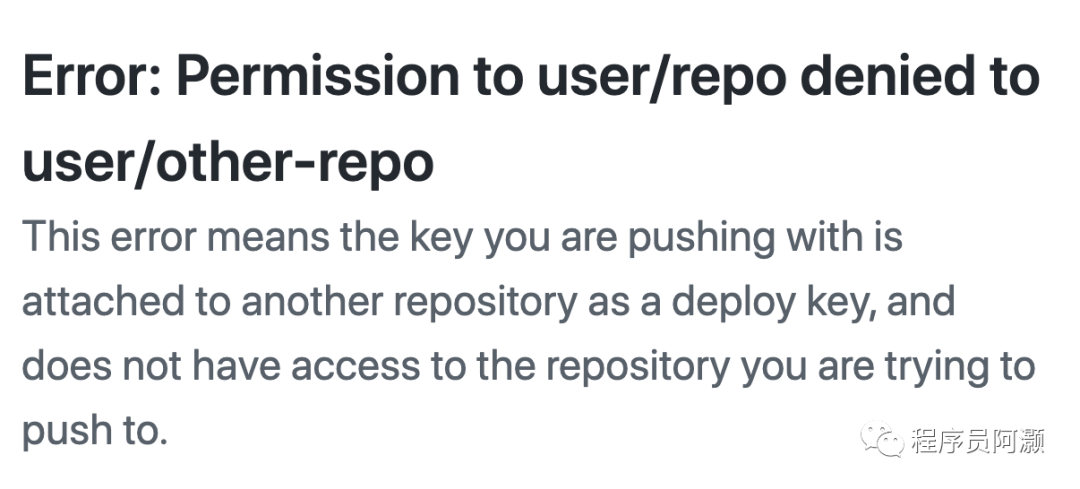
问题:

经过一番搜索后,有一个解释是比较符合遇到的情况的:

Error: Permission to user/repo denied to user/other-repo出处:https://docs.github.com/en/authentication/troubleshooting-ssh/error-permission-to-userrepo-denied-to-userother-repo
大致意思是说push代码时用到的key不是现在这个仓库的key,所以没有访问的权限,因为我是通过git协议去提交代码的,所以是需要配置key的,下面我整理下具体新建/配置key的步骤(这里以Mac为例,其他操作系统的也可以查阅官网,文末把官网地址也附上了)。
第一步: 通过ssh-keygen命令生成一对公私钥
ssh-keygen -t ed25519 -C "your_email@example.com"输入上面的命令后会有进一步的提示,这一步骤是提示输入文件名,默认也可以直接回车:
Enter a file in which to save the key (/Users/you/.ssh/id_algorithm): [Press enter]然后继续提示让输入密码,并确认密码:
Enter passphrase (empty for no passphrase): [Type a passphrase]
Enter same passphrase again: [Type passphrase again]
这个密码需要自己记住,push代码的时候是需要填写的。
第二步: 复制公钥文件的内容
上面的操作完成后,在电脑的 ~/.ssh/目录下会出现一对文件,.pub后缀的就是公钥:

打开xxxx.pub文件,复制,也可以采用这句命令:
pbcopy < ~/.ssh/id_ed25519.pub第三步: 粘贴公钥到github仓库中
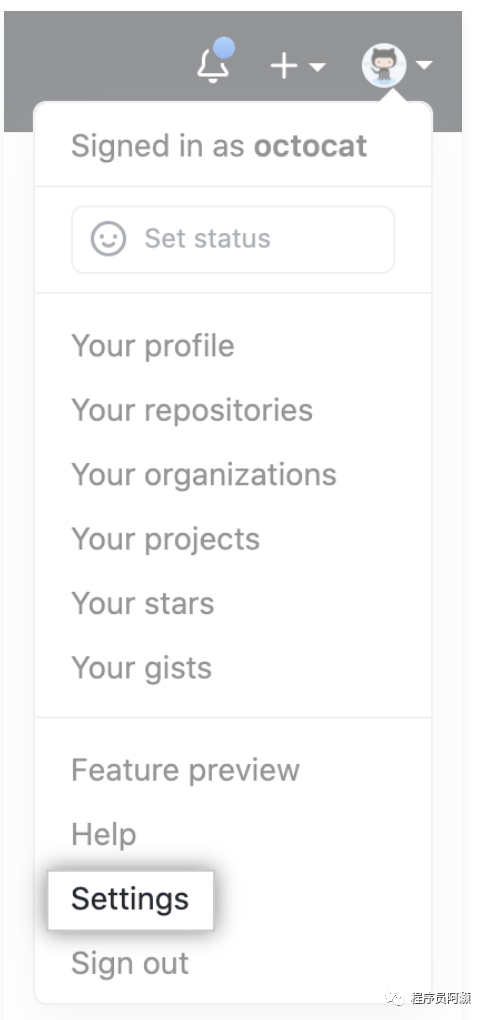
点开github的右上角账号图标,点击弹出的settings菜单,如下图所示:

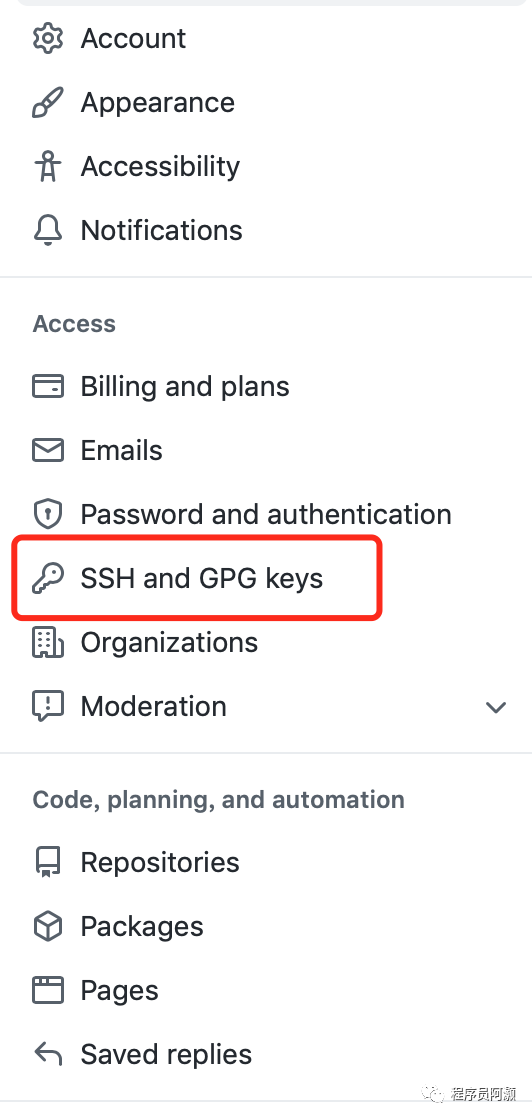
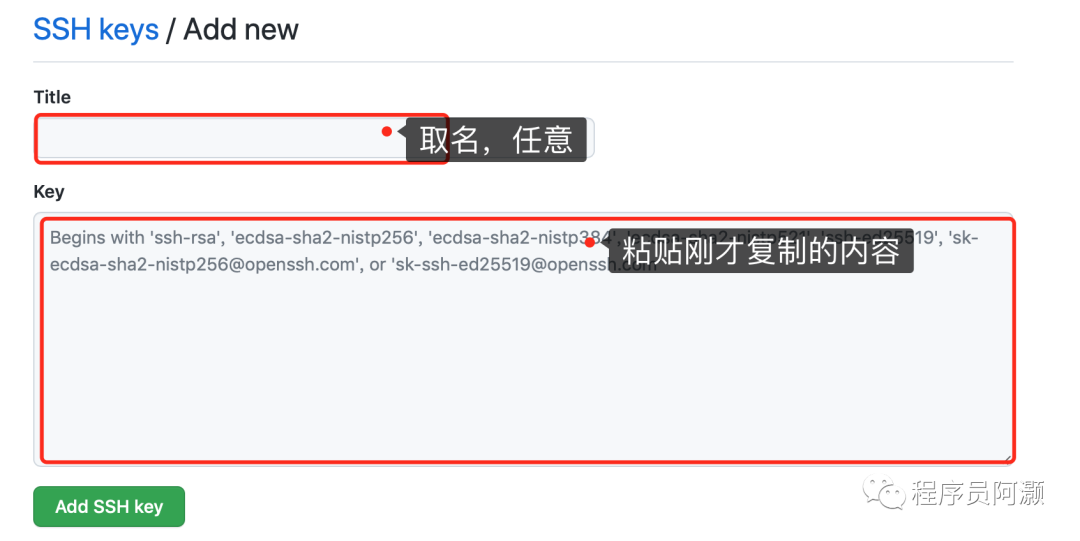
然后点击左侧的SSH and GPG keys,进入key填写页面,如下图:


然后将刚才复制的内容填入key的部分即可;

到这里,key的生成和部署已经完毕了,这时候就能顺利push代码到仓库了。
下面是Github官方完整教程,包含了Mac/Linux/Windows系统:
https://docs.github.com/en/authentication/connecting-to-github-with-ssh/generating-a-new-ssh-key-and-adding-it-to-the-ssh-agent
https://docs.github.com/en/authentication/connecting-to-github-with-ssh/adding-a-new-ssh-key-to-your-github-account
https://docs.github.com/en/authentication/connecting-to-github-with-ssh/adding-a-new-ssh-key-to-your-github-accounthttps://docs.github.com/en/authentication/connecting-to-github-with-ssh/generating-a-new-ssh-key-and-adding-it-to-the-ssh-agent